
For a long time, Microsoft Exchange and Office 365 didn’t support sending emails from additional user’s email addresses (aliases). Emails were always sent from the primary email address. Obviously, there were workarounds, such as:
- Temporary changing primary email address.
- Converting alias to a Shared Mailbox.
- Converting alias to a Distribution Group.
Luckily Microsoft finally got around to implementing proper support for sending from email aliases. It seems to have happened sometime in 2022-2023, but I only discovered this now, after a client in Oxford asked how to do exactly that.
There are still a few things you need to do as a Microsoft 365 administrator before users can start sending from their aliases.
Microsoft 365 Admin
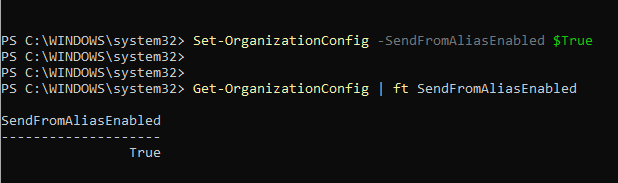
- Connect to Exchange Online with PowerShell.
- Run Set-OrganizationConfig -SendFromAliasEnabled $True to enable the Send From Alias feature for the whole Microsoft 365 tenant.
- Run Get-OrganizationConfig | ft SendFromAliasEnabled to verify that SendFromAliasEnabled is now set to True.
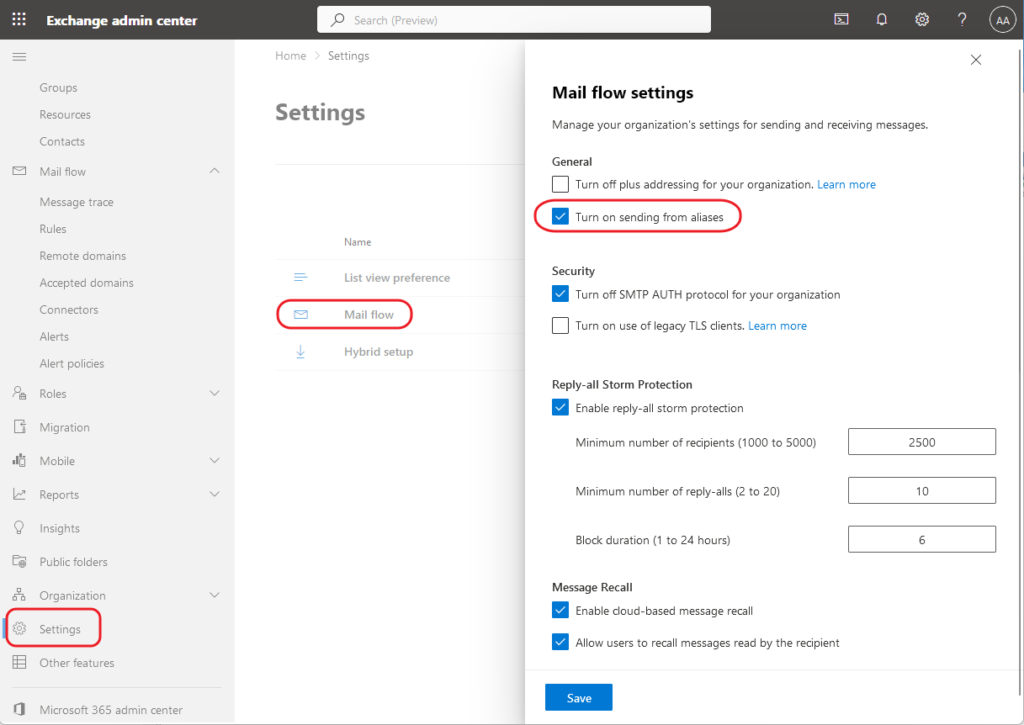
- Login to Microsoft 365 Admin Portal.
- Navigate to Exchange Admin Center > Settings > Mail Flow.
- Enable “Turn on sending from alias“.
This is all you need to do on the admin side. Give it a couple of hours to allow for the changes to sync across Microsoft infrastructure. After this, everything should work, however, there are still a couple of things you need to know. If users try to simply type the alias email address in the FROM field, Outlook will “helpfully” replace it with the primary users’ email address.
Microsoft Outlook (Desktop)
- Start a new email and click on a little arrow next to the FROM field.
- Click the “Manage List” option and in there select all the aliases you want to send emails from.
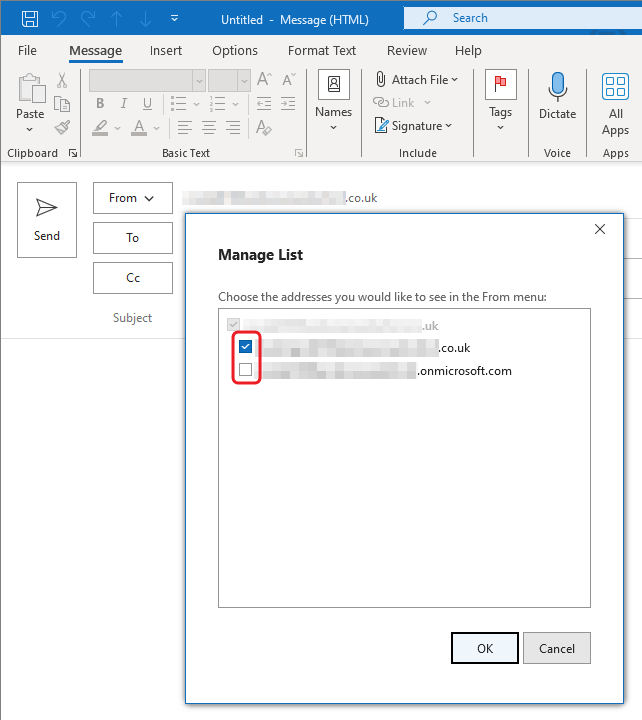
- After that, the selected aliases will be visible as an option in the FROM field.

Outlook Web App
- In Outlook web app go to Settings > Email > Compose and reply.
- Scroll down to the “Addresses to send from” section and select all the aliases you wish to send from.
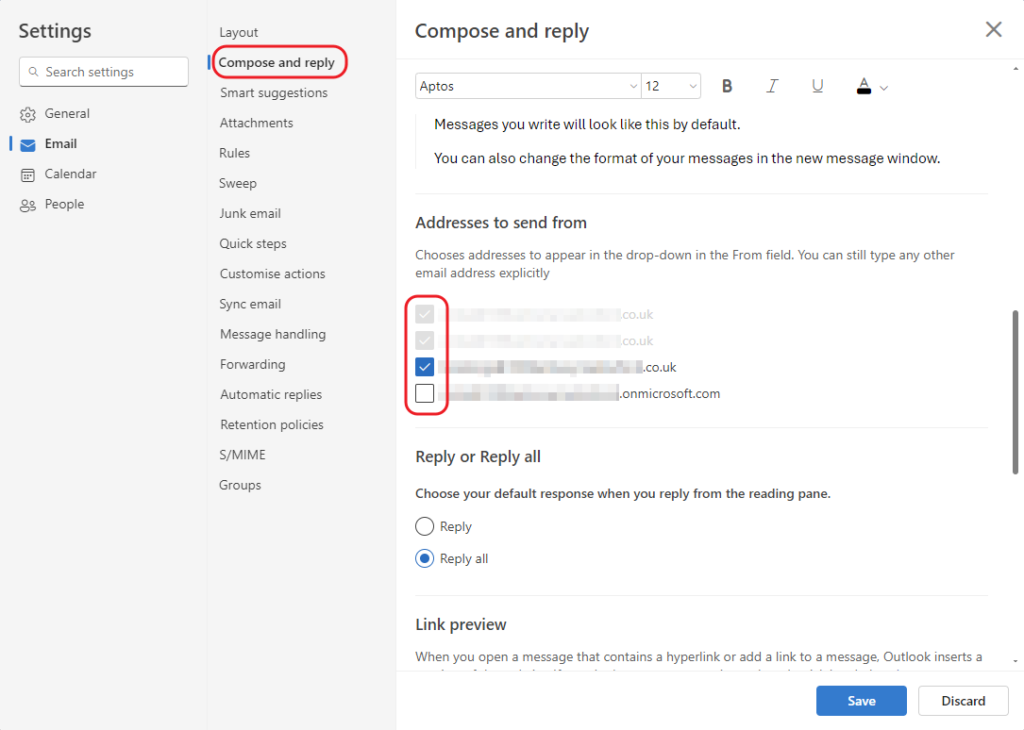
- They will now be visible in the FROM field.